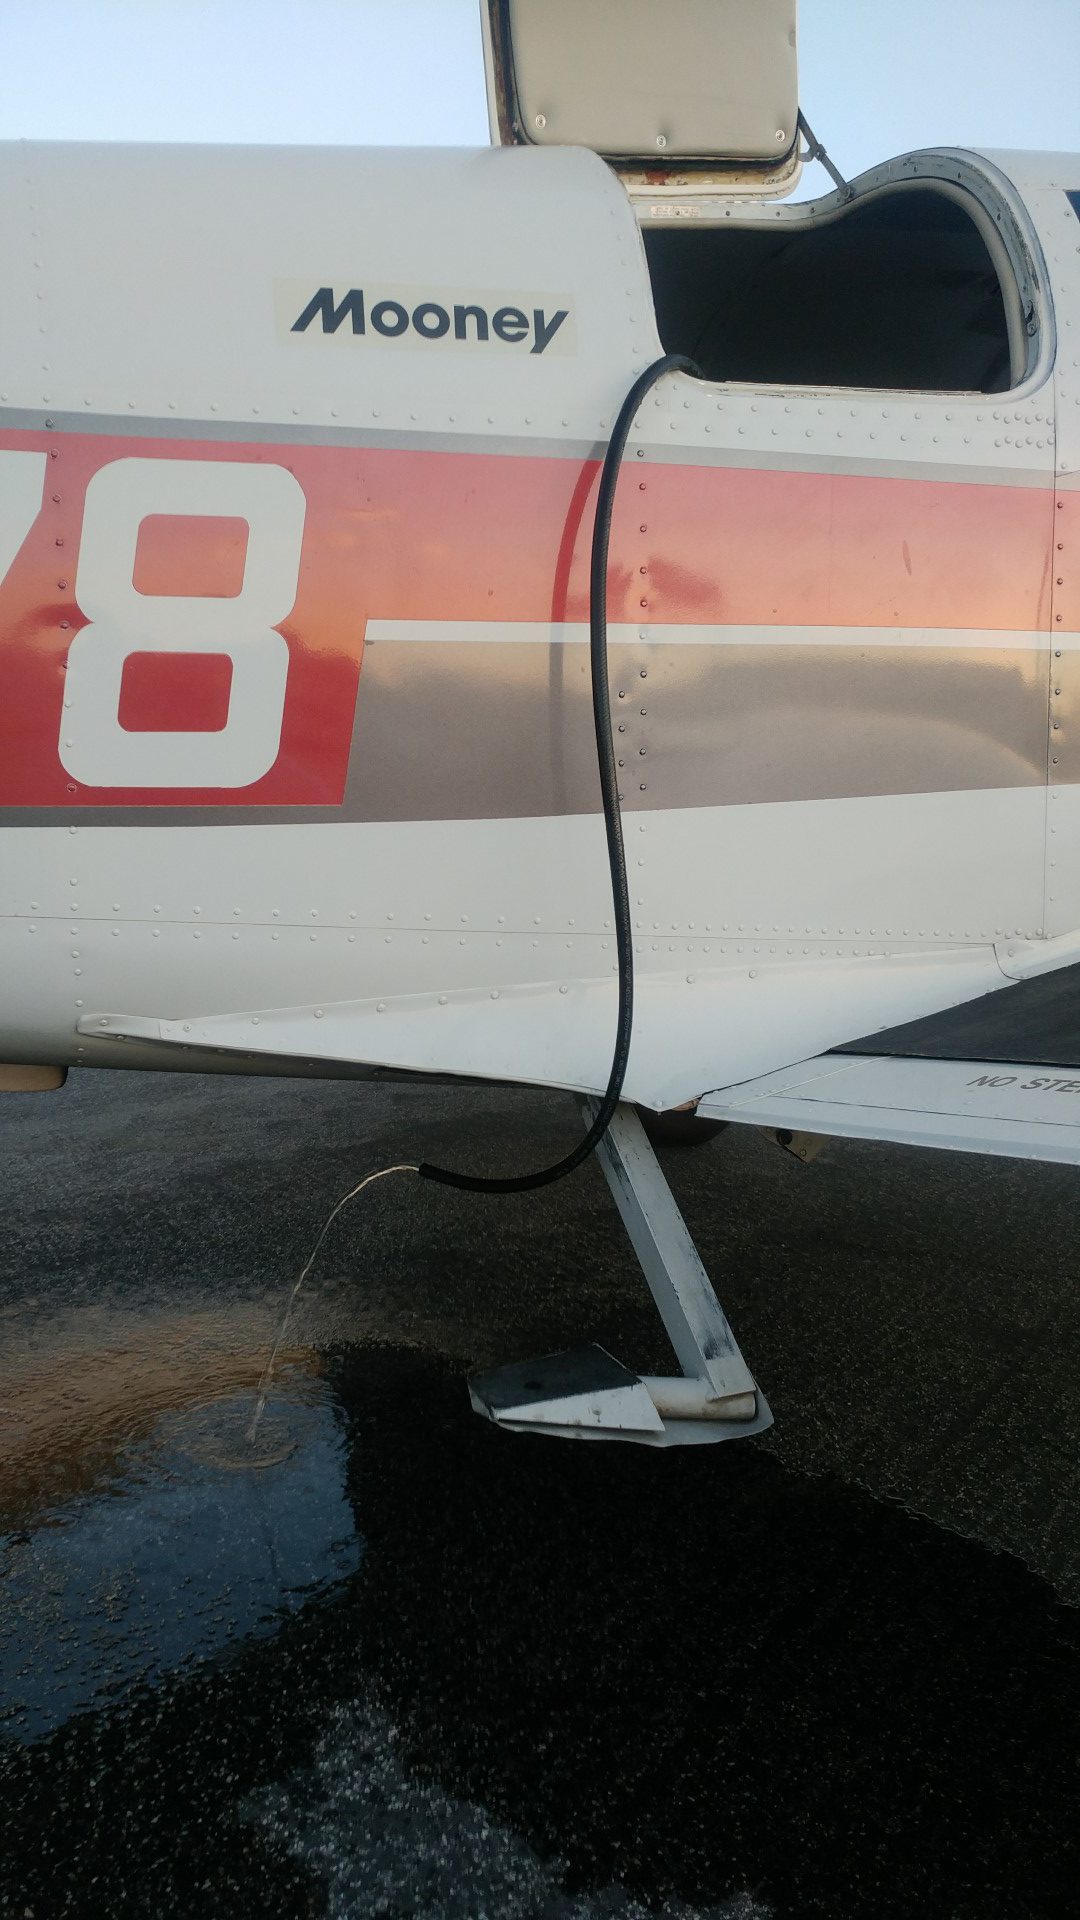
**Update 2017-08-20: I changed it from the 360GPH Bilge pump to the 63 GPH pump and it works very well. The outlets on the pump are 5/16″ ID and the outlets on the heater core are 5/8″ ID. I found that I could put 5/16″ vacuum/fuel/etc.. line (the thick walled black hose, not thin clear tubing) on the pump and it fit nicely inside the 5/8″ hose on the heater core. Because it is not under much pressure a simple worm clamp holds the larger hose snugly on the smaller hose. I also put a short piece of 5/8″ hose coming off the core and about 3′ or so of the 5/16″ attached to that. This way when I am done I simply let the hose hang out of the baggage door, down over the trailing edge of the wing, turn the pump on and let it pump the water out on the ground. It is much easier to take the empty cooler out than worry about spilling anything inside the plane. When loading up I also put the cooler into the plane empty and then add about a gallon of water and 20 lbs of ice.**
**Additional Update: I purchased a 12V cigarette lighter extension cord and wired it into the cooler. I have blade terminals on the end of the cord and at the cooler which allows me to put the cooler in and out without dragging the cord with it. Once in I connect the cord and run it along the right side of the seats up to the front and can plug it in to turn it on or unplug it. I don’t have to worry about the battery running down and I save the weight of the battery. Something similar to this will work.**
The first test of the homemade air-conditioner about a week ago was a success. The temperature at Corona (KAJO) at 2pm was 95° Fahrenheit. Just before pulling the plane out of the hangar I turned the AC Unit on. We started up and taxied to the fuel island and left the AC Unit running with the plane closed up while getting fuel. Then we climbed back in, started up, and taxied to the run-up area for to go through the pre-flight run-up. The entire time it was comfortable inside the cabin despite the temperature and the sun beating down on us. It was not “cold” but it was comfortable and I was never sweating.
The unit is big enough that it takes up 3/4 of the back seat if just two of us are flying or the same amount of space in the luggage area. I could have made it smaller but I wanted to design it with a manifold inside and also have it hold plenty of ice. I also bought a battery as I wanted it to be self-contained. The battery was still running the pump and blower after three hours of use. I need to test it to see how long it will really last. I also am considering adding a second switch to be able to turn the pump off and have the blower still working once at altitude.
Here is the parts list and the assembly. (Amazon pricing is with Amazon Prime) It came to about $130 in parts, but would have been about $100 if I went with a power adapter instead of the battery and charger. There is also some miscellaneous wire, wire nuts, blade connectors to connect to the battery and switch, heater hose, clamps, and duct tape.
- 48qt Island Breeze Cooler from WalMart – $15.88 (apprx dimensions 24″ long x 15″ high x 15″ deep)
- ExpertPower EXP12120 12 Volt 12 Amp Rechargeable battery from Amazon – $25.24
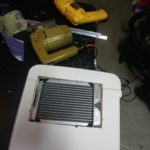
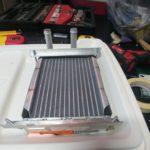
- Spectra Premium 94575 Heater Core from Amazon – $21.90
- Attwood Quiet Blower (White, 4-Inch) from Amazon – $14.76
- Battery Charger, PeleusTech 12V 14.4V 1A Portable Lead Acid Battery Smart Charger Maintainer – Black from Amazon – $11.95 (Took 24 hours to recharge after 3 hours of discharging)
- I did replace the 360/GPH pump with a 63 GPH pump. The lower flow makes the ice last longer. The replacement is Mavel Star 12 volt Small Mini Submersible Water Pump for Camping DIY Swamp Cooler PC Cpu Water Cooling Fountain Water Fall 63 GPH from Amazon – $10.99)
- Amarine-made 12v 20 Amp Waterproof Blue LED On/off Boat Marine SPST 3P Rocker Switch with Light from Amazon – $7.99
- Qty 2 – FLEX-Drain 4-in Dia Corrugated Coupling Fittings from Lowes – $1.96 ea
- FLEX-Drain 4-in Dia 90-Degree Corrugated Elbow Fittings from Lowes – $3.98
- FLEX-Drain 4-in Dia 45-Degree Corrugated Downspout Adapter Fittings from Lowes – $3.48
- Dow GREAT STUFF Gaps and Cracks 12-oz Spray Foam Insulation from Lowes – $4.48
- PLASKOLITE 2.5-ft x 3-ft x 3.9878-mil White Corrugated Plastic Sheet from Lowes – $9.58
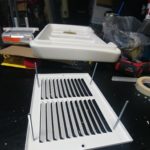
- Accord Ventilation 500 Series White Steel Louvered Sidewall/Ceiling Grilles (Rough Opening: 12.0-in x 8.0-in; Actual: 13.72-in x 9.74-in) from Lowes – $6.78
- Aluminum “L” bar (I can’t find the link on Lowes for it.)
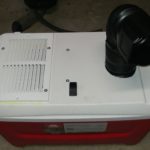
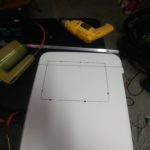
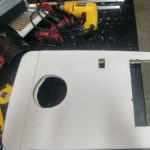
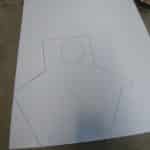
- Remove the lid from the cooler to make working easier. Draw outlines for the heater core, outlet for duct, and the switch. Drill out starting holes and then use jig saw to cut them out.
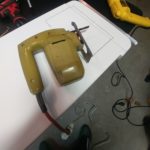
2. Check fit of heater core.
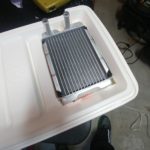
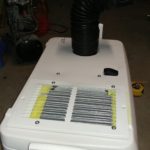
3. Measure and cut off two lengths of the aluminum l-brace to hold the heater core from the inside. Measure and drill out holes at each end of the braces, through the cooler lid, and through the cold air return vent. The vent serves the purpose of protecting the heater core and holding the core in from the outside. Don’t tighten it all the way yet.
5. Cut a piece of cardboard and slip it in between the return vent and the heater core. This will keep the spray foam insulation from coming around and clogging up the heater core from the outside. Next fill all the gaps around the core with the spray foam. You want all air forced across the core and not leaking in around the edges. After filling the gaps with the insulation you can slide the cardboard back out and tighten the nuts/screws to lock the core in place while the foam is still wet. Then mount the blower fan so that it is right up to the edge of the heater core. (Make sure you mount it the right way so it is pulling from the heater core side and blowing out the other side…)
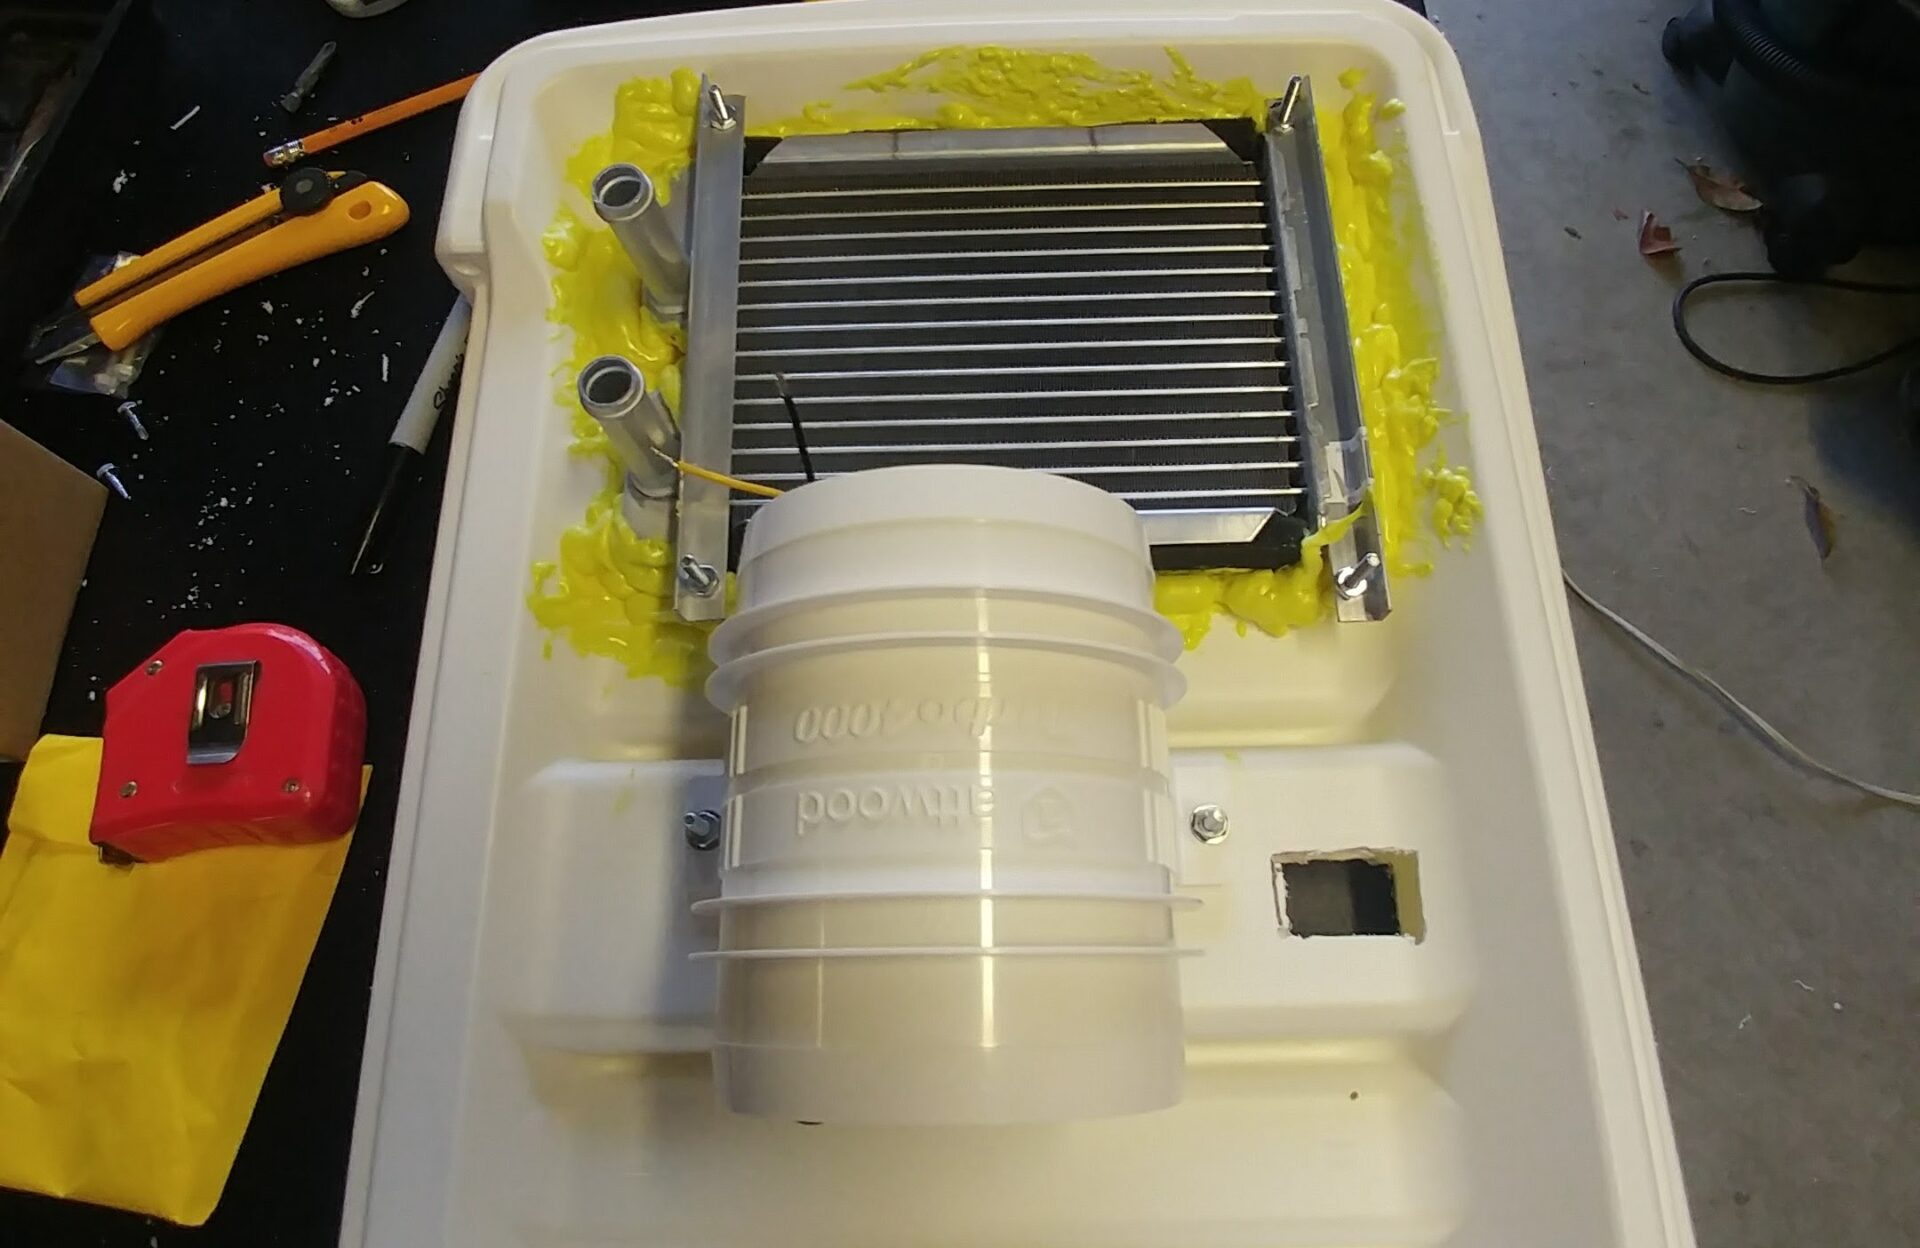
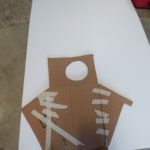
5. Using card board build a template for the manifold. The manifold will keep the air away from the ice and “should” make it last longer. I know a number of people that have made these without the manifold and get good results so you can skip this if you want. I thought I would be smart and make is so that I could bend the side pieces and have it all in tact. I ended up cutting them and putting them back together with duct tape as they did not bend well.
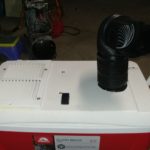
6. Assemble the manifold using duct tape. I cut off the end of one of the flex connectors just to use it to help connect the 90° elbow fitting to the blower and attached with duct tape. I also had to cut off part of the 90° elbow fitting so that it would fit in the space available. The 90° elbow goes up through the lid and then attach the other flex connector to it. The downspout adapter then attaches to the flex connector. The cooler goes in through the door on my Mooney to put in the back seat easily with the downspout adapter on it, but to put it through my luggage door into the luggage area I just have to pop the downspout adapter off and then put it back on.
7. Attach the lid, put the switch in it, and then run wires from the pump and blower to the switch. Add another set of wires with blade connectors that are long enough to go to the battery. This allows you to easily unplug the battery to remove it for charging.
8. I used an old tupperware container (apprx 7″ square and 7 1/2″ high) to put the battery in. It also holds the charger so everything is together. It is tall enough that the water won’t slosh into the container. With the lid it stays dry inside it where the battery is if the level is left a couple inches below the top.
9. Run hose from the pump to the heater core. I also ran a return line that goes to the opposite end of the cooler from the pump to ensure that the water would flow past/through the ice on it’s way back to the pump.
-
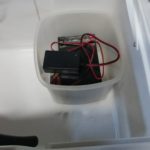
- Battery and charger in tupperware container.
-
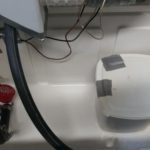
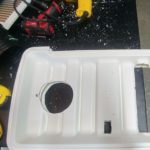
- View of inside of cooler, lid on the tupperware container.
-
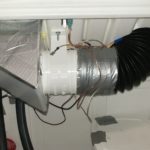
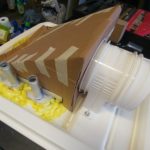
- View of the underside of the lid. The manifold on the left, the blower in the middle, and then the duct going out of the lid. The wires are looped around the duct to keep them out of the way until they are plugged into the battery.
Longer hose so that I can pump the water out of the cooler making it easier to take out of the plane.